Newsletter Articles
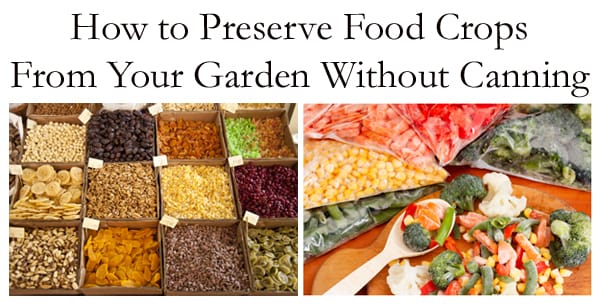
How to Preserve Food Crops From Your Garden Without Canning
Written by Susan B.
One of the summer’s time-honored traditions is canning home-grown fruits and vegetables as a way to preserve them for later use. But when it comes to canning your home-grown food crops, there are no short cuts and safety must always be the top priority. Let’s face it; the thought of canning is intimidating. You have to have a lot of supplies to do it properly, and those supplies are expensive. It’s also a process that takes many hours, so unless you have a full day to spare, you shouldn’t think about doing it. And as Dr. Andrew Weil, the noted health guru explains, there are risks of contaminating the food you can with the Clostridium botulinum bacteria. It is a dangerous disease, and people can get very sick or even die from it. Some people, including Dr. Weil, believe that canning home-grown fruits and vegetables alter the taste and appearance, so they lose the appeal of the home-grown flavor and that freshly-picked look.
Fortunately, there are other ways to preserve your bounty, and those different ways are nowhere near as complicated. And you don’t need to have a ton of expensive supplies. As long as you have an ample amount of freezer bags, freezer storage containers, and some air-tight containers and food storage bags to store things on shelves, you’re ready to go. You can also use food-grade vacuum sealed storage bags for storing vegetables after preparing them for freezing. We’re going to talk about drying and freezing the food crops you grow, what method works best for different foods, and how to prepare your harvests before you dry or freeze them.
Drying Vegetables at Home
Drying or dehydrating![]()
is one of the world’s oldest food preservation methods. The purpose of drying food is to remove moisture. Doing so prevents the good (or vegetables in this case) from spoilage. Proper drying leaves between 5% and 25% of the moisture content in the vegetable – depending on what it is that you dry.
Requirements for Successfully Drying Vegetables
- You need enough heat to remove the moisture from vegetables, but the process shouldn’t cook them.
- You must have dry air that can successfully absorb the moisture as it is released from the vegetables.
- You must also have sufficient airflow to take the moisture away.
The keys to succeeding when drying food are:
- You can remove moisture fast during the drying process.
- You can dry vegetables at a temperature that doesn’t affect their color, flavor, or texture.
The danger of starting to dry vegetables at too low a temperature is that the heat won’t kill microorganisms. If the temperature isn’t high enough to kill them, they can survive and grow in the food before it completely dries.
If the temperature is too high, and the humidity is too low, the outside of the vegetables can harden, and that can prevent the release of moisture that’s inside the vegetables. Ultimately, your vegetables won’t dry properly.
Drying vegetables is not hard to do. But it isn’t an exact science, so there may be factors that require you to adjust your process. Be prepared to adopt a “trial and error” approach to figure out what method or technique produces the most success for you.
Drying Trays and Racks
The critical criteria for choosing drying trays or racks is that they have ample airflow and that they prevent any contact between the food and the trays.
You may want to consider using cheesecloth or synthetic curtain netting to create a barrier between your vegetables and the rack or tray you use. Stretch the fabric over the oven rack, cake rack, broiler pan, or cookie sheet. Use clothespins to secure the material in place. If you plan to dry large quantities of vegetables, use shallow oven-safe trays that have bottoms with slats or holes.
Avoid using galvanized metal screens or aluminum pans to dry your vegetables. Galvanized metal is treated with substances that can have an adverse reaction when they make contact with acidic foods such as tomatoes. The same applies to aluminum.
Preparing Vegetables Before You Dry Them
Wash, trim, peel, slice, or shred your vegetables. Remove their stems, any woody portions, the core, and any bad spots. Cut your vegetables in uniform-size pieces to ensure that they dry evenly. Prepare no more than what you plan to dry immediately.
Blanching Vegetables Before Drying
Blanching is a critical step in the drying process. You can blanch vegetables in a water bath, or you can steam them. The idea is to heat the vegetables to the point of killing the enzymes. Killing the enzymes prevents them from breaking down while they dry because that alters the color and causes flavor loss both during drying and in storage.
Add water to a large pot and bring it to a boil. While the water comes to a boil, arrange the cut-up vegetables in a colander or wire basket, arranging them loosely in a 2-inch deep layer. When the water comes to a rolling boil, place your basket in the pot, making sure it sits far enough above the water to prevent contact between the vegetables and water. You can use this Colorado State University Extension Service Guide![]()
to find out the blanching and drying time for your vegetables.
Cooling and Drying Your Vegetables
After blanching your vegetables, take the pot of water and vegetables to the sink. Quickly dip the vegetables in water, making sure your vegetables still feel hot to the touch when you drain the pot water. Pour the vegetables on your drying tray or rack, and wipe away any water from the bottom of the tray or elsewhere. Spread the vegetables out on the tray so that they’re in a single layer. Put the tray in the oven or dehydrator immediately. The residual heat from blanching will jump-start the drying process. Towards the end of the oven-drying process, start keeping an eye on the vegetables. If you aren’t vigilant about watching them at this point in the drying process, they will scorch.
Once your vegetables are thoroughly dry, they should feel crispy or brittle. When they are this dry, you’ve removed all but about 10% of their moisture content.
Storing Dehydrated or Dried Vegetables
Don’t pack your dried vegetables in storage containers until they’re dehydrated. Use clean, moisture-and-vapor-resistant containers. Make sure they have tight-fitting lids. Glass or plastic food-storage containers are best. We don’t recommend storing dried vegetables in food storage or freezer bags because they aren’t insect-proof.
Freezing Home-Grown Vegetables
Blanching
Almost all vegetables need blanching before you can freeze them. It stops the enzyme activity that changes food color and causes flavor loss. Blanching also removes excess dirt and debris, it prevents vitamin loss, and it kills any hidden harmful microorganisms. The blanching process also softens veggies, and that will help you when you go to pack them before freezing. When you blanch vegetables before freezing, you scald them. Timing is critical to your success in freezing vegetables. If you over blanch them, they’ll lose their valuable nutrients, and you’ll strip them of their color and flavor. If you don’t blanch them for long enough, you stimulate the enzyme activity you sought to stop, so your vegetables will be worse off than they’d be if you didn’t blanch them at all.
As with drying, you can use one of two methods to blanch them: a water bath or steam.
For Water-Bath Blanching:
You need a blancher or large pot, a basket, and a tight-fitting pot cover. For every pound of vegetables you blanch, you’ll need a gallon of water. Bring the water to a vigorous boil. Put the basket filled with your evenly cut vegetables into the pot, and cover it. Your pot should return to a heavy boil within one minute. Start the timer as soon as the water returns to a boil with the vegetables in the pot.
Use this National Center for Home Food Preservation Blanching Time Table as a guide for water blanching.
For Steam Blanching
The steam blanching process takes about 1 ½ times longer than water-bath blanching. For steam blanching, the pot should have no more than 1-to-2-inches of water in the bottom. The basket you use in the steam blanching pot should allow the vegetables to sit a minimum of 3-inches above the bottom of the pan.
Fill the basket with a single layer of vegetables. Bring the water to a rolling boil before putting the basket in it. Once the water boils, place the basket in the pot and cover it. Keep the stove on high heat. Start your timer as soon as you cover the pot.
At the end of blanching, place the basket in a sink filled with a lot of cold water. The water temperature should be no more than 60%. Alternatively, you can use ice to cool the vegetables faster. Once the vegetables are cool, drain the basket. Place the vegetables on a dishtowel to absorb excess water.
Store vegetables you want to freeze in sturdy moisture-and-vapor resistant containers that won’t break or crack. Make sure they have air-tight seals. You can also store your vegetables in freezer bags. Be sure you release all the air before putting your bags in the freezer.
Label all of your preserved food with the date on which you processed it. Dried vegetables have a shelf life of 6-months if stored at 60 degrees F. The shelf life is 3-months if you keep them at 80 degrees F. Expect to be able to save your frozen vegetables for 8 – 12 months if stored at 0 degrees.
Preserving the food you grow so you can use it throughout the year gives you control over the quality of the food you and your family eat. And you don’t have to hope that a supermarket or specialty store will have the veggies you want when you want to use them. We’re incredibly proud of the merchandise we stock in all of our stores, so whenever you’re looking for fruit or vegetable plants or seeds, come into one of our locations to check out the inventory. Our garden experts are always available to assist you.
Do you like what you see? Sign up for our weekly newsletter to get content like this every week!