Newsletter Articles
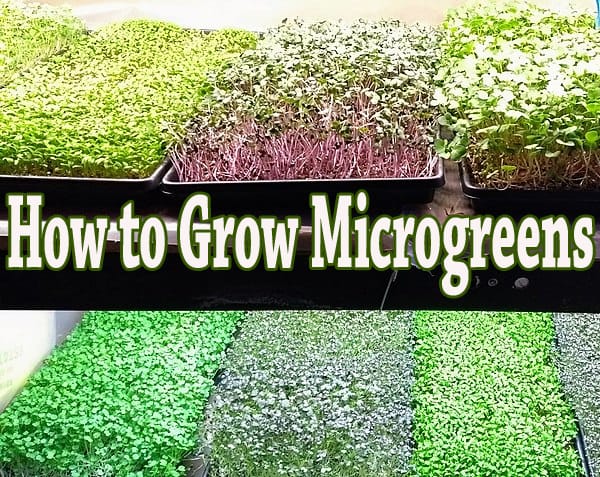
How to Grow Microgreens
Written by David S.
Microgreens are all the rage, and for a good reason; they are full of enzymes, minerals, vitamins, and health. Anyone who is looking to improve health and vitality has probably looked into the health benefits of microgreens. Most are loaded with minerals such as potassium, zinc, and iron. Another plus is that they are sources of antioxidants and other helpful plant compounds. These healthy assets make microgreens an attractive way to add vitality to your diet.
What are Microgreens?
Microgreens are slightly different from sprouted seeds, though they are just that. The difference is that you are not consuming the roots or seed casing with microgreens, just the stem, and first leaves. Another difference is that microgreens are grown in a medium such as soil. Sprouts are sprouted in a moist environment with a bit of water. Many common vegetables and herbs make lovely microgreens.
At their most basic, microgreens are seedlings that are 1-3 inches tall. The primary definition of Microgreens is that the plant has only its first two leaves. For most seedlings, that is a height of 1-3 inches — sometimes less and sometimes more.
Plant varieties for Microgreens
There is a long list of vegetables and herbs that make amazing microgreens. Those include lettuces, peas, beans, brassicas such as arugula, broccoli, kale, and herbs such as basil, lemongrass, oregano, parsley, and many others. Because the consumption of Microgreens is either cut or juiced, you can blend plant varieties to make different meals. That can include:
- Mixed salads with Microgreens
- Meals, such as stir-fry, with microgreens
- Smoothies with blended microgreens
- Smoothies with juiced microgreens
- Juice or extracts
A salad made with microgreens could contain microgreens from lettuce — may be a mixture of lettuces — beets, radish, arugula, and many others. The mixture is tossed, dressed, and consumed as part of a meal. If you have been to a fancy restaurant, you have probably seen microgreens in use. They serve them as salads, sides, and garnish. The point is that almost any plant can be a microgreen if you harvest it before its second set of leaves develop. Not every plant makes a good-for-you source of microgreens. Tomatoes, for example, have leaves that can be toxic. An excellent way to decide if a plant would make good microgreens is the word “greens.” You wouldn’t eat tomato greens, but you could eat turnip greens, salad greens, radish green, beet greens, etc.
The Magic of Microgreens
The magic of microgreens is not just the health benefits but also their flavor. Maybe it is the peppery heat from radish green or mustard greens or the aromatic and citrus flavor from lemongrass; whatever it is, it is the magic. Because microgreens are easy to grow, you can create a fantastic palette from which to experiment with flavor, aroma, and health.
The good news is that to grow microgreens, all you need is some soil, a pot, and some regular garden seeds. Here is a closer look at that process.
Setting up a garden spot or box for Microgreens.
You can grow microgreens in the ground, but it is much easier to care for and harvest them if you grow them in a shallow pot or tray. Because we are not growing mature plants, the root zone is not that important. An inch of soil will do. Seed spacing is also not necessary as the plants are harvest-ready while they are still seedlings. The goal is to cram as many seeds into a space as possible. Doing so will give you a bigger harvest.
Choose a tray or pot style that you like. The rectangular trays are made for starting seeds, and these work just fine for growing a mat of microgreens. Add soil – an excellent organic compost mix or a seed starter mix is perfect. If growing in a tray, you only need an inch of soil. If growing in a pot, you want a shallow pot so as not to waste soil. Fill the pot to about an inch below the surface; if the pot is larger, dome the soil so that the center is the highest point. Doing so will make it easier to start harvesting without the edges of the pot getting in the way.
What You Will Need
- A selection of seeds — you can plant many containers, each with its own type of seed, or you can mix different kinds of seeds in one container.
- A container — flat seed trays work well, but so do most shallow pots. If you grow these on a deck or in your kitchen, consider the many varieties of succulent ceramic pots, which come in many shapes, including trays. These are beautifully decorative and functional. The container will require draining holes.
- Growing Media — Light Warrior Seed Starting Soil by Fox Farms is an excellent place to start. You can find other types of soil designed for starting seed too. If you opt for different soil, aim for low fertilizing numbers 3-3-3, which is ideal for most seeds. Too much nitrogen can cause seeds to die before they sprout.
Fill the container with about an inch of soil. Plant the seeds according to the package paying attention to the depth of planting information only. Water lightly so that the soil is moist by not soggy. The seeds will appear based on the variety planted, and some may only take a few days. If growing indoors, rotate the container often so that the seeds grow at the same rate. Water to keep the soil moist by not wet. Soggy soil will cause problems with seed germination.
Harvesting
Harvest what you need by bunching the microgreens and then cutting with a pair of scissors about 1/2 inch above the soil line. You can cut the seedlings as close to the soil as you want, but take care not to get dirt on the greens. Wash the greens gently and spin them dry in a salad spinner. You can also blot them with a clean paper towel.
The process of growing microgreens is that easy. Green Thumb Nurseries offers a wide assortment of seeds suitable for microgreens. We also carry many styles of pots and seed starting kits and soil designed for seed starting.
Do you like what you see? Sign up for our weekly newsletter to get content like this every week!