
Newsletter Articles
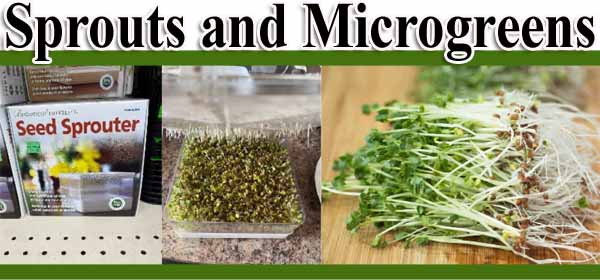
Sprouts and Microgreens
By Richard Flowers, ACCNP-Green Thumb Nursery – Ventura
Ever considered starting an indoor garden on a kitchen counter? It might seem surprising, but it involves growing edible plants. Wouldn’t it be fun and fulfilling to enjoy year-round gardening by growing a variety of sprouts and microgreens that require minimal light and water? These can be harvested in just 14 days for microgreens and 4 days for sprouts to make 2-3 salads. People often ask about the difference between sprouts and microgreens.
Both sprouts and microgreens are delicious and healthy additions to any diet. Growing them at home ensures they are fresh, packed with nutrients, and more affordable than store-bought options. They are considered superfoods because they contain high levels of antioxidants, fiber, essential minerals, and vitamins—although this can vary depending on the type of vegetable or herb seed used. Growing them indoors in small spaces like a kitchen sink or windowsill year-round is simple. Microgreens and sprouts are usually eaten raw and can be added to salads, appetizers, sandwiches, or paired with meats or fish. They can even be used as pizza toppings, adding vibrant colors and bold flavors. While both are young plants grown indoors from similar seeds, that is where their similarities end.
Now, let’s compare how they differ. With microgreens, the leaves and stems are usually edible, while their seeds are grown in soil or peat moss, unlike sprouts, which are cultivated in water. The soil provides microgreens with essential nutrients. Microgreens generally take one to three weeks to grow, depending on the plant type. Unlike sprouts, the seed itself cannot be eaten because it is still in its early development stage. The primary difference between sprouts and microgreens lies in whether the seed is planted in soil and how much of the plant is consumed. They appear and taste similar, but their cultivation methods differ. Microgreens and sprouts are at different stages in a vegetable or herb’s growth cycle. If a sprouting seed is allowed to grow further, it will eventually become a full-grown plant that produces crunchy, refreshing sprouts.
In terms of flavor, microgreens have a sharper taste than their younger counterparts, sprouts. Sprouts and microgreens, therefore, require different growing times and are cultivated using different methods and supplies. Adding microgreens to a salad boosts its flavor and nutrition, while the larger, mature greens provide the right amount of fiber and water for proper digestion, unlike sprouts.
To better understand what microgreens and sprouts are, we analyze each one separately and explore them in more detail.
Sprouts are the earliest stage of a plant’s life cycle, occurring after the seed germinates. This stage begins when the seed pushes into the soil, bursts open, and develops the cotyledons (seed leaves) and the radicle (the first root). At this point, sprouts are usually pale because they haven’t yet started photosynthesis or produced chlorophyll. They don’t need extra nutrients since they rely on the nutrients stored inside the seed, allowing them to grow without soil or other media. Add water to the seeds, and they will develop into sprouts that can grow in a jar, tray with drainage holes, a strainer, or even on a damp paper towel. Eating a sprout provides the seed’s initial nutrition, as sprouts are germinated seeds that are eaten whole, including roots, seed, and shoot, usually within 2–6 days. They are grown in water, in darkness, or with very little light. Popular seed choices include alfalfa, broccoli, green leaf, mung, radish, sunflower, wheat, and chickpeas.
When growing sprouts, it is best to use a container with a water-distributing lid that keeps the seeds evenly moist. When they are ready to harvest, this container also works well for storing sprouts in the fridge. Rinsing them repeatedly helps keep the sprouts fresh, crunchy, and flavorful.
There are different methods to grow sprouts. Some people prefer using mason jars, while others opt for a seed sprouting kit that provides the necessary tools but does not include the seeds. The kit includes:
- Two stackable trays for sprout cultivation.
- Two-tray dividers are designed for growing multiple crops simultaneously.
- A water-diffusing lid simplifies watering.
- Water-catching base designed to collect draining water.
- Instruction manual featuring recipes.
Before starting, thoroughly cleanse the seed sprouter to ensure it stays hygienic and to prevent bacterial growth. Disassemble the entire system. You can place your seed sprouter in the top rack of the dishwasher, but hand washing is recommended. Use gentle dish soap to carefully scrub each piece. Allow all parts to dry completely before spreading any seeds. Once everything is dry, reassemble the seed sprouter. The optimal temperature for growth is 70°F.
Soak the seeds overnight in a jar filled with lukewarm water for 8 to 12 hours, then drain. The seeds are now ready to use with the sprouter. It helps to pour the seeds and their soaking water directly into the sprouter so the seeds can drain into the base. Some people prefer to treat the seeds first with 3% peroxide and hot water heated to 140 degrees Fahrenheit for 5 minutes. This step also helps reduce the risk of bacterial contamination. Then, strain the seeds.
Next, evenly spread out the seeds. If using multiple types of seeds, tray dividers can be helpful. Label each section to identify the plant variety growing. If growing only one type, dividers are not necessary. Scatter the seeds in a single layer. Use a popsicle stick to move the seeds into place gently. Popsicle sticks are also helpful in labeling crops. After broadcasting the seed, cover it with the diffusing lid and place the sprouting system in a spot with indirect light.
Drain and rinse the water twice daily to prevent mold or bacterial growth caused by high humidity. Mold and bacteria may not be safe to eat. Remove the base of the seed sprouter and place it in the sink. Slowly pour cups of water over the diffusing lid, then let the water drain completely before placing the trays back on the base. Visible mold or fungi may cause an unpleasant smell. If this happens, thoroughly clean the vessel and start again.
After 2 to 6 days, when they reach about 1 to 2 inches long, they are ready to harvest. To harvest, gently remove them from the tray by hand. Store them in an airtight container in the refrigerator and use within a week. Many people even cook them to kill bacteria. Leaving sprouts in the sprouter and storing them in the fridge is very convenient. Harvest the sprouts as needed, and rinse them regularly to keep them fresh and crunchy.
Please note that some seeds take longer to grow than others. It is recommended to research each seed variety to determine the estimated harvest date.
Once that batch is complete, thoroughly clean the growing area. Repeat the process for the next batch, or better yet, run multiple batches either simultaneously or at different times.
If you provide sprouts with a growing medium, such as potting soil, and expose them to light, they will develop into microgreens and eventually become small plants. We stop that growth early so they don’t need soil or light to sprout at home. Once the young plant outgrows its initial shoot and root, it moves on to the microgreen stage.
Now, we explain what a microgreen is.
Microgreens grow during the cotyledon stage when the plant’s first two leaves develop. The “cotyledon” usually becomes the plant’s initial set of leaves. These form inside the seed and act like regular leaves in photosynthesis—both convert light into chemical energy that the plant uses to grow. Types of microgreens include kale, arugula, beet greens, onions, radish greens, watercress, chard, bok choy, cilantro, basil, chervil, parsley, and chives. Microgreens are young seedlings harvested once the first true leaves appear, usually when they are 1–3 inches tall. They are grown in soil or a similar medium, require sunlight, and take 1–3 weeks to reach harvest size. The stems and leaves are eaten, not the seed. Microgreens originate from the same seed plants that grow into full-sized plants, but are planted more densely and harvested early in their growth cycle.
Growing microgreens hydroponically is an option; however, this writing will focus on growing them in soil.
Here is an easy method to grow microgreens.
Prepare a seed tray and moisten the growing medium. A good starting medium is fine-textured soil; a common choice is seed-starting mix. When adding soil, do not fill the tray completely, and ensure the surface is smooth for even coverage. Bottom watering is recommended to reduce the risk of mold by placing a small amount of water at the bottom of the seed tray before adding soil.
Spread the seeds evenly and place a weight, such as another tray, on top to apply gentle pressure. Label the areas where they are sewn. It is possible to grow multiple varieties in the same space, but be sure to label each one. Using a popsicle stick also works well for labeling. Spray water gently using a mist from a spray bottle. Keep the soil evenly moist, but avoid waterlogging.
Use a different tray and moisten its interior with water. Then, flip it upside down and cover the planted seeds to create a dark and humid environment. This cover presses the seeds into the soil and mimics the darkness needed for germination, helping the seeds grow stronger and healthier. The seeds need warmth, humidity, and darkness to germinate within the first 3–4 days (depending on the seed type). Mist every 12 hours or as needed for 3-4 days while they germinate. When the cover begins to lift, remove it. Keep checking on the seeds daily for progress. Once they have sprouted, expose them to light.
Place the microgreen tray on a sunny windowsill or use an LED grow light for about 12 to 16 hours daily. Regularly check the growth and monitor progress. Harvest takes between 7 and 14 days, depending on the seed type. Once they reach a harvestable height with true leaves, they are ready to be picked. To harvest, use clean scissors and cut just above soil level. Unlike with sprouts, we do not eat the whole plant; only the stems and leaves are eaten because the roots are covered in growing medium.
Store unwashed and rinse just before eating. Repeat this process for the next batch, or better yet, run multiple batches at different times or all at once.
Please remember that some seeds need to soak before planting, and it is recommended to research each seed type first.
Growing small plants in a limited space can yield big rewards, improve health, and show that nearly anyone can succeed. Visit your favorite Green Thumb Nursery for a wide range of seeds and gardening supplies to help reach your gardening goals.
Do you like what you see? Sign up for our weekly newsletter to get content like this every week!
CLICK HERE TO SIGN UP!